Guide
Designing a Food Preparation Workflow: From Receiving to Dispatch
A good workflow moves product in one direction with no backtracking. Learn how to map and improve yours.
Free to inquire. We reply by email, usually within one business day.
To design a food preparation workflow, map every step from receiving to dispatch, mark where product and people move, remove backtracking and crossings between raw and ready-to-eat, place equipment and storage close to the steps that use them, test in a trial session and refine. A one-way flow saves time and reduces contamination risk.
Why workflow matters
Workflow is how product and people move through the kitchen. Poor workflow wastes time, causes collisions and raises contamination risk. In a rented kitchen, where every minute is paid for and space is shared, a smooth flow is worth real money.
The best workflows feel boringly simple: everything has a place, product moves one way and nobody walks further than necessary.
Improving workflow is usually cheaper than buying equipment or adding hours.
Draw the current flow
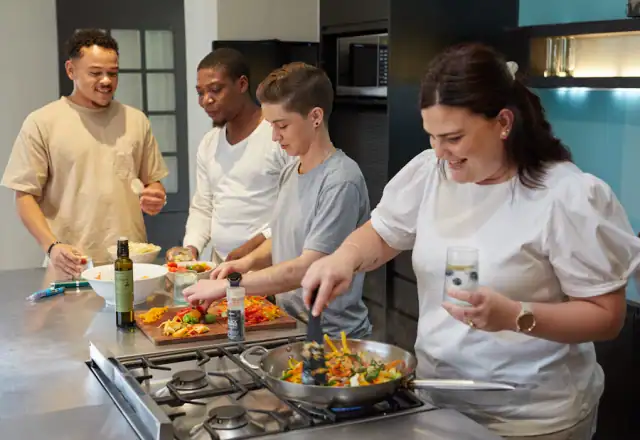
Sketch a floor plan of your station and the parts of the kitchen you use. Trace the path of one batch with a pen from the delivery door to the dispatch point and mark every stop. Note each time product or people backtrack or cross.
Do the same for staff movement. Time each leg with a stopwatch. You will often find long walks you never noticed.
See choosing the right kitchen size for how layout interacts with space.
The core stages
- Receiving and inspection
- Storage: dry, chilled, frozen
- Preparation: washing, cutting, weighing
- Cooking or baking
- Cooling and chilling
- Portioning, packing and labeling
- Dispatch or collection
- Cleaning and waste
Each stage should have a defined area, equipment and a clear handoff to the next.
Prevent cross-contamination by design
Separate raw and ready-to-eat zones, and place handwashing at the boundary. Keep allergen tasks apart and use color-coded tools. Plan product so that finished food never passes back through raw areas.
Where space is tight, use time separation: raw first, then clean, then ready-to-eat. See cross-contamination and allergen management in a shared kitchen.
Layout and discipline together are more effective than either alone.
Place equipment and storage close to use
Put the cooler near prep, the oven near the loading side of your bench and the packing station near dispatch. Keep frequently used tools within arm’s reach and heavy items at waist height. Use trolleys to cut trips.
In a shared kitchen you may not control placement, but you can choose your station and arrange your own tools. Ask for a station that fits your flow.
Questions to ask when you review your workflow
- Where does product wait the longest?
- How many times do we walk to storage?
- Do any steps cross raw and ready-to-eat?
- Can any stages run in parallel?
- Where do mistakes happen most?
- What would a new person find confusing?
Answer them with your team after a session and choose one improvement to test next time.
Keep improving
Workflow is never finished. Review it when volume, products or staff change, and after any problem. Ask for feedback at the end of each session. Photograph the layout so that you can restore it.
A good workflow is your quiet competitive advantage, because it lowers cost per unit every day.
If your kitchen layout limits you, ask about a different station or a larger format.
Workflow for different types of business
| Business | Workflow emphasis |
|---|---|
| Caterer | Batch prep, cooling, loading and transport |
| Baker | Mixing, proofing, baking and cooling in a line |
| Meal prep | Cook, cool, portion, pack and label |
| Ghost kitchen | Order to station to pack to pickup |
| Packaged food | Cook, fill, seal, label and store |
Use the row that matches you and adapt the principles to your products.
Reduce touches and trips
Every time product is picked up and put down it costs time. Combine steps, use one container from prep to cooking where safe and pre-measure ingredients into labeled containers. Batch similar tasks together.
Count trips to the cooler, sink and storage in a session and look for ways to halve them. Small changes, such as a rolling rack, make a big difference.
Standardize where things go so that new staff learn the layout quickly.
Documenting your workflow for new staff
A simple one-page diagram and a short run sheet make training faster. Show the layout, number the steps and add a photo of the correct setup. Include quality checks and safety reminders. Review the document after each change so it stays accurate. New staff reach full speed faster and make fewer errors.
Share the document with the operator if it affects shared areas.
Measuring workflow performance
Track a few simple measures: time per batch, units per hour, waste and number of times staff wait. Compare weekly. When a measure moves, ask why. A drop in units per hour might mean a new person needs training or equipment is slower than usual. Use the numbers to decide where to improve next.
Measure for learning, not blame, and share results with the team.
Visual management and standard work
Make the workflow visible with floor markings, labeled shelves, color-coded tools and a one-page run sheet. Standard work means everyone does a task the same way, which reduces variation and makes training easier. Write the steps, take photos of the correct set-up and review them with the team. When someone finds a better way, test it and update the standard.
Visible, simple systems are easier to follow than complicated ones.
Test and measure
Run a trial session and time each stage. Compare with your plan, and note the places where staff wait or walk. Try one change at a time, so you know what works. Keep a before and after plan.
Involve your team. The people doing the work often see the best improvements.
Record results in your run sheet and update it. See planning a batch production schedule.
Case study: a baker improving flow
A baker found her sessions took six hours for 200 loaves. Mapping the flow showed that she walked to the storage shelf 25 times, shaped bread far from the oven and cooled loaves on a bench that blocked the sink. She moved her flour and tools to one shelf near the mixer, put a rolling rack between the bench and the oven and cooled loaves on a rack against the wall. Sessions fell to four hours and forty minutes with no extra equipment.
The lesson is that small layout changes can save an hour or more, and that you only find them by tracing the real flow.
More on running a rented kitchen
This page is part of our running a rented kitchen guide. Follow the pathways below to move up to the overview, compare alongside topics or go deeper into the detail.
Start with the overview
- Kitchen Rental Resource CenterPlain-English guides organized by what you need to do: choose a kitchen, operate safely and…
- Pricing and Rental PlansA clear explanation of what you pay for, what changes the price and how to get a quote…
- How Renting WorksSix clear steps from first inquiry to your first confirmed session, with what to prepare…
Compare alongside
- Calculating Oven Capacity for ProductionOven time is the limit for most bakers. Learn to turn trays, bake times and changeovers…
- Scheduling Staff in a Shared KitchenMore people in a shared kitchen means more coordination. Learn how to schedule roles…
- Planning Refrigeration CapacityCold space is limited and expensive. Learn to size it from your real flow of ingredients…
- Planning a Batch Production ScheduleA written schedule turns a chaotic production day into a repeatable routine. Learn how to…
Go deeper
- Preparation WorkstationsYour workstation is where most of your session happens. Here is what to measure and ask…
- Choosing the Right Kitchen SizeToo small and you are stuck; too big and you pay for empty space. Learn to size a kitchen…
- Allergen Management in a Shared KitchenAllergen safety is a team effort in a shared kitchen. Learn how to assess risk, separate…
- Kitchen Rules and HygieneClear standards protect your food, your reputation and the other businesses using the…
Frequently asked questions
Straight answers to the questions food businesses ask most about designing a food preparation workflow.
What is the most common workflow mistake?
Backtracking and crossing between raw and ready-to-eat.
How do I map my workflow?
Sketch a plan and trace a batch with times.
Can I change my station layout?
Within the kitchen’s rules, yes. Ask staff.
How much time can workflow save?
Often 10 to 30 percent of a session.
Does workflow affect safety?
Yes. Good flow reduces contamination.
How often should I review it?
Monthly at first, then when anything changes.
Put this guide into practice in a real kitchen
Tell us about your food business and the hours you need. We match you with a licensed kitchen and send a written quote.