
Guide
Your First Day in a Rental Kitchen: Induction Checklist
Your first session sets the pattern for everything after it. Use this checklist to start calmly, safely and on time.
Free to inquire. We reply by email, usually within one business day.
On your first day in a rental kitchen, arrive early, bring your documents and supplies, complete the induction, check access and emergency equipment, find your station and storage, test equipment with staff, label and store everything, keep a timer for setup and cleaning and photograph the space before you leave. Plan a gentle first session and learn the routine.
Prepare the day before
Confirm your booking, check the access instructions and gather your documents, labels, thermometer, knives, gloves and containers. Plan a modest menu for the first session, since everything will take longer in unfamiliar space. Charge your phone, bring a notebook and a camera if allowed.
Review the kitchen rules and any notes from your tour so that questions are ready. A calm first day starts with preparation.
Tell your team the plan and who is responsible for each task.
Arrive early and check in
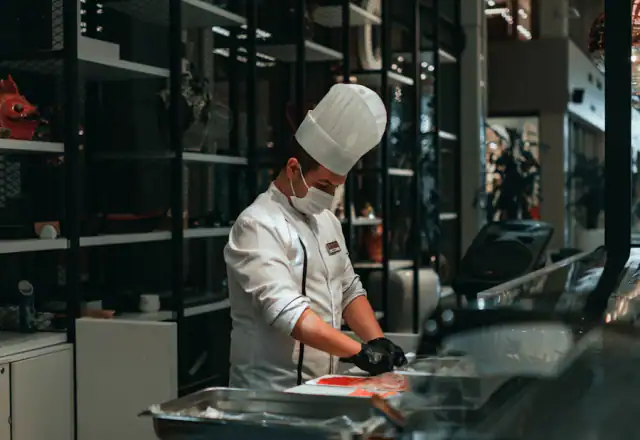
Arrive before your slot starts so that you can find your way, meet staff and complete any formalities. Check in as instructed, show your documents if asked and confirm which station and storage are yours. Put away personal items in lockers, wash your hands and change into kitchen clothing.
If anything is not as expected, tell staff immediately and note it. Early problems are easy to fix and hard to explain later.
Allow at least 20 to 30 minutes before your slot for orientation.
Complete the induction
The induction covers equipment use, safety, cleaning standards, allergen handling, booking and access. Ask questions, practice using equipment with a staff member watching and make sure you understand how to shut things down in an emergency.

- Equipment operation and safe shutdown
- Cleaning and sanitizing standards
- Allergen and cross-contamination controls
- Waste, grease and recycling
- Booking, check-in and check-out
Take notes. You will not remember everything otherwise.
Know your emergency equipment
Locate fire exits, extinguishers, the fire blanket, first-aid kit, eyewash and gas and electrical shut-offs. Ask who to contact in an emergency and how to report incidents. Practice walking to the exit from your station.
These details matter most when you hope never to need them. A minute on day one can prevent harm later.
See security and access for how emergencies and entry are managed.
A printable first-day checklist
- Confirm booking, access and documents
- Arrive 20 to 30 minutes early
- Complete induction and note emergency equipment
- Set up station, label and store ingredients
- Run a simple first production with a timer
- Clean down to standard and take photos
- Check out and note questions for staff
- Review the session and book the next one
Keep the list on your phone or print it for your team so every new person follows the same routine.
Common first-day mistakes
- Arriving without documents or labels
- Overloading the first session with too many products
- Forgetting to allow time for cleaning
- Not asking questions about equipment
- Leaving storage unlabeled
- Ignoring the location of emergency equipment
Each mistake is easy to avoid if you use the checklist, and each costs far more to fix once the habit is set.
Set up your station and storage
Sanitize your bench before you begin, lay out tools and containers and place your ingredients in your allocated storage with labels. Photograph the layout so that you can reproduce it, and note where everything lives.
Check that handwashing, sinks and bins are within reach. If something is missing, ask staff. See preparation workstations.
Keep your first layout simple and refine it over the next sessions.

What the first month should look like
In the first month focus on learning, not maximizing output. Week one is for induction, trial recipes and finding your rhythm. Week two is for tightening timings and layout. Week three is for adding a second product, and week four is for reviewing costs and booking pattern. Keep notes each session and ask staff for feedback. Many renters find that by the end of the month their sessions are noticeably shorter and calmer than they were on day one.
Set a review date at the end of the month to decide whether your plan and hours still fit.
Run a simple first production
Choose a product you know well and use a recipe you have tested. Time each step, note how equipment behaves and record anything unusual. Avoid experiments with new recipes on day one. The goal is to learn the space, not to maximize output.
Stay in communication with staff if equipment does not behave as expected. Adjust your timings for the next session.
See how much kitchen time should you book for how to refine your estimates.
Building a good relationship with staff and other tenants
The people around you are a resource. Learn the staff’s names, thank them for help and follow rules without needing reminders. Be friendly with other tenants, tidy and punctual. Good relationships lead to better slots, quicker help and friendly advice when problems arise. A reputation for being easy to work with is valuable in a shared kitchen.
Respect for the space and the people in it is the foundation of a long, successful rental.
Review and plan your next session
After the first session, write down what went well and what slowed you down. Adjust your layout, timings and shopping. Ask staff for feedback and answers to anything that confused you. Book your next session with improved estimates.
Share lessons with your team. By the third session most renters have found a rhythm.
If something is unsuitable, raise it early. A good operator will help you fix it.
Clean down and check out
Allow generous time for cleaning. Wash, rinse and sanitize equipment and surfaces, clean floors and sinks, empty bins and return shared items. Label and store product, switch off equipment and take photographs of the clean space.
Check out as instructed and note anything you want to ask or report. See the kitchen rules for the standard expected.
Leaving the kitchen clean builds goodwill with staff and other tenants from the start.

More on choosing and renting a kitchen
This page is part of our choosing and renting a kitchen guide. Follow the pathways below to move up to the overview, compare alongside topics or go deeper into the detail.
Start with the overview
- Kitchen Rental Resource CenterPlain-English guides organized by what you need to do: choose a kitchen, operate safely and…
- Pricing and Rental PlansA clear explanation of what you pay for, what changes the price and how to get a quote…
- How Renting WorksSix clear steps from first inquiry to your first confirmed session, with what to prepare…
Compare alongside
- What Is Commercial Kitchen Rental?Everything a first-time renter needs to understand before comparing kitchens, from how the…
- Moving from One Rental Kitchen to AnotherChanging kitchens does not have to interrupt production. This plan keeps your orders, stock…
- Shared vs Private Kitchen RentalShared kitchens cost less and private kitchens give control. This guide shows how to decide…
- Allergen Management in a Shared KitchenAllergen safety is a team effort in a shared kitchen. Learn how to assess risk, separate…
Go deeper
- Kitchen Rules and HygieneClear standards protect your food, your reputation and the other businesses using the…
- Availability and BookingRequest the time you need, learn how confirmations work and see what to expect before…
- How Much Kitchen Time Should You Book?Most renters book too little time. Use this method to estimate every stage of a session and…
- Kitchen Security and AccessYou need to get in at 4 a.m. and know your stock is safe. Here is how kitchen access and…
Frequently asked questions
Straight answers to the questions food businesses ask most about first day in a rental kitchen.
How early should I arrive?
Twenty to thirty minutes before your slot for orientation.
Should I cook a full production on day one?
Keep it modest while you learn the space.
What should I bring?
Documents, labels, thermometer, knives, gloves, containers and a notebook.
What if equipment is not as expected?
Tell staff immediately and note it.
Can I take photos?
Often in your own area. Ask first.
Who do I call in an emergency?
Staff will explain during induction. Note the numbers.
Put this guide into practice in a real kitchen
Tell us about your food business and the hours you need. We match you with a licensed kitchen and send a written quote.